Cost

Maximize the ROI On Your Property With Our Free ADU Investment Proforma Worksheet

If you are considering investing in an Accessory Dwelling Unit (ADU) to maximize the value of your property or generate rental income, you have found the right place. Homeowners like you are an integral part of addressing our housing issues, while ADUs can also be a huge part of building generational wealth. Modern ADU Plans has developed free resources to help you make informed decisions about your ADU project. Along with our ADU Budget Worksheet, we highly recommend downloading our comprehensive ADU Investment Proforma Worksheet.

But First, Why Choose To Build An ADU?

ADUs are on the rise across the US and Canada for good reason. Accessory Dwelling Units help homeowners increase their property value, generate rental income, or provide a space for family members and guests. Many of our cleints even build an ADU for themselves to move into so they can rent out the larger main house. This is especially popular if their kids have grown up and moved off to college.

Not only are ADUs great for homeowners like you, they are also great for our communities. Towns and Cities across the country are facing housing shortages as we have underbuilt housing for decades now. We see this issue manifest in the homeless crisis we see and hear about on the news and in our towns. ADUs can be a great way to add new housing options in an affordable way without leading to sprawl. They are a sustainable way to increase housing supply within our communities.

These versatile structures are cost-effective, environmentally friendly, and can significantly boost the overall value of your property while improving your neighborhood.

Make Informed ADU Investment Decisions

Like investing in other real estate assets, building an ADU requires careful planning and consideration of various factors such as construction costs, potential rental income, financing options, and return on investment. Our free ADU Investment Proforma Worksheet is designed by experts in the field to help you analyze these crucial aspects and make sound financial decisions.

Although small in size, building an ADU is still a significant investment. It takes hundreds of thousands of dollars to build a quality ADU and we want you to spend your money wisely. Specifically, we want you to have a positive return on this investment. You should see cashflow on a monthly basis through rental income as well as an increase in your property value if you ever decide to sell the property in the future. This is why we advise our clients to work through a project proforma and develop a comprehensive project budget at the outset of an ADU project.

The Power of Data-driven Planning For Your ADU

Our worksheet provides a clear layout for inputting your project specifics, including construction costs, estimated rental income, financing terms, and ongoing expenses. By utilizing this powerful tool, you can project your potential cash flow, calculate your return on investment, and assess the financial viability of your ADU project.

What you need to do is some basic research on your local market. Input the going rates for similar sized rental units in your area, research local construction costs, and contact your bank for information on financing options. We can also assit you with answering these questions and filling out the proforma if you need help.

How to Get Your Free ADU Investment Proforma Worksheet

To access this valuable resource and kickstart your ADU investment journey, simply download our free ADU Investment Proforma Worksheet using the short form to the right. Empower yourself with the knowledge and tools needed to make informed decisions and maximize the potential of your property by planning for your new Accessory Dwelling Unit.

Don't miss out on this opportunity to take control of your financial future with an ADU investment. Download our free worksheet today and embark on your path to property enhancement and financial success!

Disclaimer: The information provided in the ADU Investment Proforma Worksheet is for general informational purposes only and should not be considered financial advice or legal advice. Please consult with a qualified professional for personalized guidance tailored to your specific situation.

Invest wisely, invest in ADUs with Modern ADU Plans.


Your ADU Proforma worksheet is complete and you are ready for the next steps?

There are a few ways you can move your project forward after you work through the proforma and make the decision to proceed with building an ADU.

You can hire a designer to help develop a custom designed ADU, purchase a pre-designed ADU plan, or talk to an ADU expert to discuss your ideas and develop a plan. Modern ADU Plans offers all of these options to help homeowners like you achieve your ADU goals.

There are three convenient buttons to the right, each offering you a way to take the next step towards your ADU.

Maximizing Your ADU Budget: Download Our Free ADU Budget Worksheet Today

If you are considering building an Accessory Dwelling Unit (ADU) but feeling overwhelmed by the costs involved, we sympathize. ADUs are significant investments even though they are small houses. There is also a lot of misleading information out there on ADU Facebook Groups, ADU blogs, and other sources. Budgeting for an ADU project can be a daunting task, and can get complicated, which is why we have created a comprehensive ADU Budget Worksheet to help you plan effectively and maximize your budget.

Why You Need an ADU Budget Worksheet

Your ADU project's budget is crucial to ensure that you stay on track and avoid financial surprises along the way. Planning early and accurately can help you save costs and avoid mistakes on your ADU build. Our ADU Budget Worksheet is designed to assist you in estimating costs accurately, identifying potential expenses, and helping you make informed decisions throughout the construction process. It is a guide that you can use early on in the planning process, but also set up to help you track the actual costs and compare them against your budget throughout the ADU design and construction process.

What Does Our ADU Budget Worksheet Offer?

Our free ADU Budget Worksheet includes detailed sections for all aspects of your ADU project budget, such as:

  • Construction Costs: Estimate expenses for materials, labor, permits, and more.

  • Design and Planning Fees: Include costs for architectural plans, engineering, and other design-related expenses.

  • Utility Connections: Budget for water, electricity, and gas connections.

  • Interior Finishes: Plan for flooring, fixtures, appliances, and other interior design elements.

  • Exterior Finishes: Estimate costs for siding, roofing, landscaping, and other exterior finishes.

  • Contingency Fund: Allocate a percentage of your budget for unforeseen expenses.

How to Download Our Free ADU Budget Worksheet

Getting your hands on our ADU Budget Worksheet is easy! Simply click the download link to the right to access this essential tool for your ADU project. Take the first step towards a well-planned and budget-friendly ADU construction process today.

Don't let financial concerns hold you back from realizing your ADU dream. Download our free ADU Budget Worksheet now and pave the way for a successful and cost-effective ADU project. Download now and start building your dream ADU with confidence!

Remember, proper budgeting is the key to a stress-free ADU construction experience. Let our ADU Budget Worksheet be your guide as you embark on this exciting journey.

Your ADU budget worksheet is filled out and you are ready for the next steps?

There are a few ways you can move your project forward after you work through the budget. You can hire a designer to help develop a custom designed ADU, purchase a pre-designed ADU plan, or talk to an ADU expert to discuss your ideas and develop a plan. Luckily Modern ADU Plans offers all of these options to help homeowners like you achieve your ADU goals.

There are three convenient buttons on the right side of this blog, each one offering you a way to take the next step towards your ADU.


Next Steps for your ADU Project:

Case Study: the Garcia Family and Their Backyard ADU Investment

The Garcia family, located in sunny California, faced a common challenge as their family grew: the need for more space. With adult children struggling to afford the cost of purchasing a new home close to their parents, they decided to explore the idea of adding an Accessory Dwelling Unit (ADU) to their property for multi-generational living. The idea was for the parents to move into the ADU designed for barrier-free living and aging-in-place, while the younger family members moved into the main house. Little did they know, this decision would result in a great return on their investment and much more.

The Decision to Invest in an ADU

After careful consideration and research, the Garcia family made the decision to move forward with building an ADU in their backyard. They saw it as an opportunity to create additional living space for their family, and also as a potential source of rental income in the future. The flexibility and potential for a high return on investment made the idea even more attractive.

What pushed them in this direction was the incredibly high cost of purchasing a single family home in California. The cost of building a new construction detached backyard ADU was approximately half the cost of buying a new home which made this decision a no brainer for their family.

Construction and Design

The Garcia family wanted a high quality design but also were hoping to minimize the cost of the design process as well as cut down on the time a custom design would take. After researching a variety of options including hiring an architect for a custom designed ADU, purchasing a prefab ADU, or going with a pre-designed ADU plan set, they decided that starting with the pre-designed plans but then customizing their preferred plan to fit their needs was the best approach - balancing cost and quality.

They worked closely with our team of ADU professionals to adapt one of the modern ADU plans for sale. The accessory dwelling unit was designed to be a comfortable, fully functional living space complete with a kitchen, bathroom, and large bedroom that offered great views to the backyard garden.

The thoughtful ADU design was focused on barrier free living and aging-in-place perfect for their parents to move into and age gracefully.

Although it was designed for elderly residents, the high-quality design will enable the ADU to be a desirable living space for potential renters in the future. This gives the new backyard ADU the flexibility for immediate needs and long term financial return on the investment.

Return on Investment

After the completion of the ADU, the Garcia family enjoyed the immediate benefits of the additional space. Their adult child who moved into the main house, was able to afford their own home for their growing family while still being close to their parents. They also had the added benefit of child care close by. The ADU saved thousands of dollars each month compared to the rental prices in their area. It also will be a lot cheaper than having their parents move into a retirement or assisted living home in the future.

They also have a ready made rental unit in the future that they estimate would bring in between $2,000 and $3,000 dollars per month in rent if/when they decide to put it on the market. This will give the young family additional income and provide financial flexibility.

Added Property Value

The backyard ADU not only provided financial benefits but also added value to the Garcia family’s property. The increased square footage, modern design, and the versatility of having an additional living space on the property boosted the overall value of their home. Should they decide to sell in the future, the presence of the ADU could potentially attract more potential buyers and increase the resale value of their property, potentially by hundreds of thousands of dollars. Taking the tight residential real estate market in California into consideration, and they anticipate the value to continue to rise significantly over time.

Conclusion

The Garcia family's decision to invest in building a backyard ADU proved to be a wise choice and one that thousands of families are deciding to make each year. From providing much-needed space for their growing family to generating a significant return on investment through rental income and added property value, their backyard ADU has been a great success. Their story serves as an example of how an ADU can be a wise investment, providing practical and financial benefits for homeowners. If you’re considering adding an ADU to your property, the Garcia family's experience is a testament to the potential rewards that come with this decision.

—-

Stay tuned for more inspiring stories and useful tips on modern ADU living at Modern ADU Plans.
Thank you for the opportunity to share this story and highlight the positive impact of adding an ADU to a property.

What Should Design Fees Be For A Custom Designed ADU?

There is a lot of misinformation out there regarding what is an appropriate design cost for ADU Projects. Hopefully this post will help cover some aspects of this debate so you can better budget for your project.

When embarking on an Accessory Dwelling Unit (ADU) project, one of the critical decisions you'll face is determining the appropriate design fees for professionals to help you with your project. As an experienced ADU designer, I've had the privilege of working on numerous ADU projects across the country, and I firmly believe that investing in professional design services is the cornerstone of a successful outcome.

In this article, I'll provide a comprehensive perspective on design fees, focusing on why allocating 10-15% of your project budget to these services is not only reasonable but often a prudent investment in your ADU project.

If you read forums or facebook posts asking about ADU design fees and people are saying that $10,000 or more is expensive be very skeptical. If you are paying below $10,000 for designer services I would be very nervous about the quality of work you are getting or the experience level of the designer. Yes, there are designers out there willing to work for cheap prices, but you will also be getting cheap service. Remember, you get what you pay for.

1. The Value of Professional Expertise:

Architects and experienced ADU designers bring a wealth of expertise to ADU projects. From understanding local building codes and regulations to creating sustainable, efficient and aesthetically pleasing designs, our knowledge is invaluable.

ADUs require careful planning to maximize space, ensure structural integrity, and meet safety standards. By allocating an appropriate percentage of your budget to design fees, you're not just paying for drawings; you're investing in the peace of mind that comes with knowing your project is in capable hands. You are making an investment. And like other investments it will pay off in the long run.

2. Tailored Solutions for Your Needs:

Quality designers don’t provide one-size-fits-all solutions. Instead, we build expertise in particular project types over years of studying, and practicing. We then work closely with you to understand your unique needs, preferences, and vision for your ADU, and draw on our experience to deliver a high quality design.

The design process is a collaborative effort, where your input is integrated into every decision, ensuring that the final product aligns with your goals and the specifics of your property. The level of customization and attention to detail that an architect or experienced designer can provide justifies the fees associated with their services.

3. Navigating Regulatory Challenges:

Local regulations, zoning requirements, climate variables, site conditions, and building codes can be complex and vary significantly from one property to another. Experienced designers are well-equipped to navigate this maze.

By working with a professional, you reduce the risk of costly mistakes, delays, or design revisions that may result from non-compliance. This ensures your project proceeds more smoothly, saving both time and money in the long run. And even when a designer runs up against regulatory hurdles, they know how to research codes, talk with staff at the building department, and negotiate their way through the approval process.

4. Maximizing Your Investment:

A well-designed ADU can significantly increase your property's value. By allocating 10-15% of your project budget to design fees, you're not just paying for the design itself; you're investing in a more valuable asset.

A thoughtfully designed ADU will attract tenants more easily, potentially increasing rental income and reducing vacancy time.

For homeowners, the value of your property will rise, ensuring that your investment pays off. The initial investment in design may sound like a lot, but it’s actually a very small part of the overall project budget, and even smaller part of the lifecycle cost of your project. For most ADUs, the design fees will be offset with only 6-12 months of rental income. This doesn’t even take into account the increase in your property value.

Considering ADUs can last decades, design is a tiny investment to make in a long term appreciating asset that can cashflow on a monthly basis.

5. Long-Term Savings:

Professional designers don’t just think about the immediate construction phase but also about the long-term sustainability of your ADU.

They can incorporate energy-efficient design elements that lead to lower utility bills and reduced maintenance costs. This can translate into significant savings over the years, offsetting the initial design fees and contributing to the overall financial viability of your ADU project.

Often these lifecycle savings can be multiples larger than the initial design fees. Wouldn’t you spend $25,000 to hire an experienced designer now to save $3,000 to $4,000 in maintenance and utility costs per year over 20 years? Design fees can easily cover themselves when taking a long term view of your ADU project.

6. What is an Appropriate Design Fee:

We have referenced 10-15% a few times in this article and I think it is a good range to roughly estimate what the fees should be for your ADU project. As you are setting your overall project budget it would be wise to pencil in fees in that range. The percentage can vary depending on the quality of the designer (higher fees often mean more experienced, better designers!), the complexity of your project, and the overall scope of work you ask the designer to handle for you.

This percentage range probably translates into an actual fee in the $20,000 to $50,000 range based on average costs of detached new construction ADU projects these days. We find that most ADUs come in at between $200,000 and $400,000 with some fancier, more luxurious designs coming in even higher than that.

This might sound like a lot of money, but like we discussed above, think of design as an investment, not a fee. You are hiring an expert to guide you through the process, help you make the best decisions for your project, and to be an advisor who has your best interest in mind as they work on your project.

Investing in design is money well spent. I even argue that the higher the design fees the better your project will come out. With higher fees you will get to hire a more experienced team, you will get more attention, and that expert design team can spend more time working to make your project a big success.

7. Start With A Total Project Budget (Design Fees Are Not An Added Cost):

Too many people take the viewpoint that the cost of hiring a designer is an added fee increasing their project cost. You may look at design as a place that you can save money. This is the wrong viewpoint.

Begin by developing a total amount you are willing to invest in your project. Say it is $300,000 all-in. Now you work backwards from that number to break down your budget into different buckets.

Say there are $10,000 in estimated permit fees. Investing in a expert design team runs $30,000. Add $4,500 for structural engineering, $5,000 for a survey, and $500 for title 24 report. That is a total soft cost amount of $50,000, which leaves a construction budget of $250,000 for the ADU itself. You should be able to get a high quality ADU designed by a team of experts all within the total project budget.

Looking at the chart below, you can see how small the design fees actually are in the context of the total project cost.

In conclusion, while design fees for your ADU project may initially seem like an added cost, they are, in fact, a prudent investment in your project's success. Allocating 10-15% of your budget to design fees ensures you receive a customized, code-compliant, and aesthetically pleasing design. The expertise, tailored solutions, and regulatory know-how that an experienced designer provides can save you time, money, and stress in the long run. Moreover, a well-designed ADU can increase your property's value and generate long-term savings, making it a sound financial decision. So, don't hesitate to invest in professional design services; it's an investment that pays dividends in the quality and value of your ADU project.

A Homeowner's Guide to Financing ADU Projects: Unlocking the Potential of Your Property

Imagine this: You've been living in your cozy home for years, cherishing countless memories within its walls. But as life evolves, you find yourself needing additional space for various reasons—an aging parent who requires close care, a growing family, need for a home office, or even an opportunity to generate passive income. That's when the idea of an Accessory Dwelling Unit (ADU) comes into play. This comprehensive guide will walk you through the financing options available to homeowners like yourself, empowering you to turn your ADU dream into a reality.

Meet Sarah, a homeowner with a growing family and a desire to create a separate living space for her elderly parents. She wanted her parents to be close by, yet maintain their privacy and independence. Sarah had heard about ADUs and was fascinated by the concept, but she had concerns about financing such a project. However, after researching different options and exploring financing avenues, she discovered a range of possibilities that made her ADU dream achievable within her budget. Inspired by Sarah's success, let's delve into the world of financing ADU projects and explore the various avenues available to homeowners.

Understanding the Cost of ADU Projects Before exploring financing options

It's essential to have a clear understanding of the potential costs involved in ADU construction. Factors such as size, design complexity, location, and desired amenities can significantly impact the overall budget. By carefully evaluating these elements, you can develop a realistic financial plan and explore suitable financing options.

Based on recent construction data, detached, new construction ADUs can fall anywhere from $200,000 to almost $1,000,000 to build. This is a crazy wide range, but it reflects the variety of ADUs, the various costs in different markets, and the complications that each unique site or design can have on construction costs. If you take out the outliers, building a project budget of between $240,00 to $380,000 would allow you to build a high-quality accessory dwelling unit project.

Traditional Financing Solutions for ADUs

These are some of the most common and easiest ways to get financing for the construction of your ADU project.

  1. Home Equity Loans and HELOCs: Utilizing the equity in your home to secure a loan can be an effective way to finance your ADU project. Home equity loans provide a lump sum, while a Home Equity Line of Credit (HELOC) allows you to access funds as needed.

  2. Cash-Out Refinancing: If you have substantial equity in your home, consider refinancing your mortgage to access cash for your ADU project. This option allows you to replace your existing mortgage with a new loan while withdrawing a portion of your home's equity as cash. Typically this would mean taking out a new 30-year mortgage which can spread your ADU payments out over a long period of time. This is great for rental units as it can mean having positive cashflow on a monthly basis.

Government ADU Financing Options

  1. FHA 203(k) Rehabilitation Loan: This program is designed for homeowners seeking to finance both the purchase or refinancing of a home and the cost of ADU construction. It provides a single loan, combining the costs into one mortgage payment.

  2. Fannie Mae HomeStyle Renovation Loan: Similar to the FHA 203(k) program, this loan option allows homeowners to finance the purchase or refinance of a home along with the cost of renovations, including ADU construction.

Alternative Financing Strategies for ADU Projects

  1. Construction Loans: These loans provide short-term financing to cover the costs of construction. Once the ADU is complete, homeowners can refinance the construction loan into a traditional mortgage.

  2. Personal Loans: For smaller ADU projects, personal loans can offer a flexible financing solution. Although interest rates may be higher, they often have less stringent requirements and faster approval processes.

  3. Hard Money Loans: A hard money loan is a specific type of asset-based loan: a financing instrument through which a borrower receives funds secured by real property. Hard money loans are typically issued by private investors or companies. The downside of using hard money loans is they typically have a high interest rate and shorter repayment term.

ADU-Specific Financing Programs

Some regions and organizations offer specialized financing programs tailored to ADU projects. Research local programs, grants, or incentives that may help offset the costs of construction or provide favorable loan terms. These programs rarely will cover the full cost of building an ADU but can be combined with some of the other financing options described above to help you cover the full project costs.

Embarking on an ADU project can be a transformative journey that enhances your living situation and opens doors to new possibilities. By understanding the costs involved and exploring various financing options, homeowners like you can confidently pursue their ADU dreams. Whether it's tapping into home equity, leveraging government programs, or exploring alternative financing strategies, the path to financing your ADU project is within reach. Take the first step, explore your options,

ADU Cost: What Can We Learn From Portland?

We look at ADU Costs in Portland and around the country with designer Lucas Gray, who has been designing custom ADUs for several years. Portland is a very mature market, so it's nice to look up there to see what we can learn about the costs of building an Accessory Dwelling Unit (ADU). Lucas Gray, from Modern ADU Plans, came on the show to talk shop and goes into the costs of ADUs, what homeowners can do to budget and control their ADU cost, and more.

If you are thinking of adding an ADU but are curious what sort of investment you will need to make, watch this interview to learn more about how much Accessory Dwelling Units cost and other tips on the design and construction process. It is important to compare the investment you make in creating an ADU with the return you will get through rental income, property value increases, and other benefits. ADUs aren’t cheap, but they are a great investment when you weight the costs and returns.

It is also important to consider that costs can cary greatly from place to place. California ADUs may cost a lot more than Portland ADUs or Texas ADUs, but with higher rental prices these projects often make sense in any location that they are allowed.

Video: ADU Costs - What we can learn from Portland

I was interviewed by Ryan O’Connell from How To ADU about the cost of designing and building ADU projects in both Portland (and across Oregon State) and in the Bay Area (and across California). You can watch the interview below.

How To ADU has a ton of great resources, articles, and videos about ADUs. It is a great place to learn more about these projects. If you are considering an ADU but want to learn more check out their site (or of course you can contact me as well).

There are a few other ways you can get started with an ADU project. I offer custom design services for clients looking for beautiful and sustainable ADU projects. I love working with clients who want to create high quality spaces and don’t want to sacrifice on quality.

I also sell pre-designed ADU Plans for people who are looking to save time and money and who can’t afford fully customized design. There are over 15 different designs and plans available that can work for almost any need. Click the button below to shop for the plan that fits your specific needs.


Frequently Asked Questions about Designing and Building Custom Homes

How does the design process work?

We have a set design process that we lead you through in order to deliver the best results. We break down each project into 5 phases so there is a clear and predictable path that each project moves along. We have outlined this process in detail in another post. Click the button below to learn more.

How long does it take to design a Custom Home?

This can vary greatly from project to project depending on the specifics of the property, the size of the home, and the clients. If you can make decisions relatively quickly we can design a home in 6-9 months. If you want to take your time and deliberate longer on decisions than a 1-year design timeline is a good rough estimate. Keep in mind, this is for the design work. The permitting review and construction process would be added on to these estimate. For a rough order of magnitude you can anticipate 1.5 to 2 years total from start to finish. As we mentioned in our Value statement, we want to serve the best interest of our clients and that takes time. Like the growth of the slow food movement as a pushback against unhealthy fast food, we believe quality is vital and working diligently through our process leads to the best results. And the best results take time.

How much does it cost to build a custom home?

We expanded on this in more detail here. However, as a quick estimate you can assume a custom home would start at around $1 million and go up depending on the size, the site, the quality of materials, systems, and other elements in the project. Your overall budget is really about your goals and ideas and how much you want and are able to spend on the project. We have design small homes, ADUs, that were around $300,000 and we have designed full custom homes for $1,000,000. Larger, higher-end, homes are easily $2 million or more. It really depends on what you are specifically looking for. We start our design process by interviewing you to better understand your wants, needs, goals, ideas, and lifestyle so we can deliver a project that is unique to the specifics of your life and property.

What is included in the design fee?

When any client first contacts us we listen to their goal and ideas, we then ask questions to get an intimate understanding of what they want and need, and what their lifestyle is so we can best craft a solution. Based on this analysis of the uniqueness of your project, we develop a proposal that is specific to your project and the value we can provide as designers and advisors. We also offer tiers of services that you can select to best serve your needs, expectations, and budget. This is a long way of saying, “it depends.”

Generally speaking, our design fees cover Predesign, Schematic Design, Construction Documents, Permitting, and Construction Administration. These are the five phases we guide each project through from our first meeting to handing you the keys to a beautiful custom home. You can learn more about what each of the phases covers by reading the Design Process post linked above.

What other expenses should I expect?

Outside of the design fees there are a handful of expenses that you need to consider. First is the construction cost, of course. This would be the cost of materials and labor paid to the General Contractor. There will also be a handful of consultants needed to complete your project. This includes a surveyor, structural engineer, perhaps a Civil Engineer and Geotechnical engineer (these depend on the property and full scope of design work), arborists, and landscape designers. There may also need to be energy consultants or other special consultants depending on the local requirements.

Other than construction costs and consultant fees, the other major expense will be the Permitting fees assessed by your local jurisdiction. Each city and town is different and has different fee structures so we will conduct that research and report on estimated permitting costs during our Pre-design phase.

How will I know that I will like the end result?

Design is an iterative process and involves sharing ideas, discussing your style, taste, preferences, needs, and wants. It is our job to listen to you, learn about your lifestyle, and understand what you are looking for and then transform that into a design of your custom home. Throughout the design process you will sit down with us as we present design ideas, floor plan layouts, and other drawings to describe the look and feel of your home. Together we will talk through pros and cons of different options and actually sketch ideas as we refine the design into a beautiful home that reflects your values. This iterative process has led to successful designs that our clients love as well as designs that have been recognized and won awards from the design community.

It is also recommended that you look through our portfolio, follow our instagram account, and make sure that our style and values are aligned with what you are looking for. We tend to design modern or contemporary styled projects that are connected to nature and influenced by the landscape around them. If you are looking for a craftsman style suburban home we probably aren’t the right designer for you. However, if you like the work you see on our website, I’m confident that we can design a beautiful project that you love and are proud to call home.

What drawings are included in your services?

There are two main drawing sets that are created during our design process. There is the Schematic Design set and the Construction Documents set. Each has their own specific drawings that are included. For the SD set we include a site plan, floor plans, elevations, sections, and 3D views to describe the design intent. However, to arrive at the final drawing package we do a lot of drawings as we present options and work through the iterative design process. There are a series of plans, elevations, 3D views and hand sketches that we create and use to talk through design ideas along the way.

The Construction Documents Set includes all of the drawings that are needed to both receive a permit from the local building department as well as the information needed for a General Contractor to bid and then build the project. This includes but is not limited to: general notes, a detailed site plan, dimensioned floor plans, building elevations, building sections, foundation plans, reflected ceiling plans, enlarged floor plans, interior elevations, assemblies, schedules, construction details, finishes, fixtures, and equipment lists, and structural engineering and other drawings provided by the consultant team.

Who manages the permitting process?

It is part of our standard scope of work to oversee the permitting of our projects. This includes compiling the permit drawings, filling out permit applications, and submitting all of this to the local building department. We then follow up to respond to any review questions or requests for additional information. There may be a few forms you are required to sign as the project owner, but otherwise we manage the process on your behalf.

Do you have experience working in my local area?

I have worked across the country and around the world and have had success on projects regardless of location. I worked remotely on a project in northern Alberta and I worked with communities as far away as rural Japan. I lived and worked in Thailand, China, and Germany. In earlier years I worked on the design of train stations in Russia, renovations in Berlin, and ADUs in Seattle and the Bay Area. I’ve lived and worked in Portland, Oregon and designed over 100 projects across Oregon. My home base is currently Brooklyn, NY but I travel frequently for work and pleasure. The point is, I may have some experience in your area but I also know how to work in different locations. Regardless of the location of the project, I do the research needed to understand the local rules and regulations, the local permitting process. I collaborate with local contractors and craftspeople, and of course I visit the site to understand the unique aspects of your property and the surrounding landscape.

Do you stay involved during construction?

Absolutely. It is vital to have your designer follow the project through to completion. There are always some adjustments when translating drawings into a built home and we are there to help answer questions, make suggestions, and observe that the construction is following the design intent. I will be an advocate for you during the construction process to get a high-quality home that aligns with the values and design ideas we worked on throughout our design process. A designer stepping away during construction is irresponsible and doesn’t have their client’s best interest at heart. Construction Administration is an important part of our standard services for all residential projects.

Do you have builders/General Contractors you can recommend?

Recommending contractors is part of our services. Working with trustworthy, high-quality contractors and craftspeople is key to the success of a project. In places where we have already completed projects we can recommend people we had great working relationships with. In new locations we do an extensive search to find qualified contractors to collaborate with. This means reviewing contractor websites, talking to local designers, architects, and engineers to get recommendations. We reach out to the companies that have a good reputation and interview them and ask for references to follow up with. Ultimate we typically recommend about 3 companies for each project and have you meet with them. It is important that you meet and get a good feeling for the contractor as they will be a big part of the success of your project. We want to make sure you have a good feeling about them and they are both excellent communicators and have the experience needed to build a finely crafted home.

Can we make changes to the design during construction?

Changes during construction are not recommended. Change orders are often what causes budgets to get out of control. It is always much more expensive to make changes during construction than working out design options on paper. It is also important to consider that there are many factors that influenced what was design. Changes during construction can affect structural systems or may not meet codes that were considered during the initial design. Even when contractors make suggestions for changes in order to save money, we find that often it ads as much expenses and what they think they will save. Major changes require additional drawings and details to document what is changing and need to be reviewed by the jurisdiction as a permit revision. And even small changes can cause delays and additional costs. For these reasons we highly recommend that once construction begins we all stick to the original design.

Custom Homes: How Much Do They Cost?

If you are considering designing and building a custom home there are three steps you need to take as you embark on this journey. You have to find land, find a designer and builder, and set a project budget. When people reach out to us about their projects, cost considerations are typically the first question they ask. They may already have land picked out, or are looking for our help as they consider different properties. What they are most stressed about is seeing if they can afford a project that meets their goals and ideas. Budget is top of mind and usually a big part of our early conversations. Here we will discuss the various aspects of a project budget and some numbers of recent projects so you can have a jumping off point as you consider your project.

When I read articles like this, I always get frustrated trying to find the answer to the first question. How much will it cost? Rather than make you scroll all the way to the bottom (although you should definitely read through everything) let’s get right to the chase. The answer is $1,260,000 plus the cost of land.

Of course that isn’t exactly accurate. It is impossible to give you an exact number without knowing more about the specifics of your project, but it it isn’t that far fetched. I would say that most nicely designed custom homes will start at around $1 million and go up from there. It may be possible to build something very nice for under that amount, especially if you are looking for a smaller project like a weekend getaway cabin, or some other modest project. But for most full sized houses, say 1,500 square feet and up, I would venture to guess that the final cost will start at around $1 million when all factors are considered. Keep reading for a more detailed breakdown of how these costs add up.

There are three main expenses you will need to plan for with a custom home. The first is the cost of the land. Second is the soft costs - all the fees that are needed to develop the design and get permission to build the project. Third are the hard costs - the expenses of actually building the project.

Land Costs

Unfortunately you are going to hear this a lot, but this cost is widely variable. Depending on the location, the local market, the type of land, the quality of the property, surrounding property values, views, water features, and other qualities, the price can fluctuate. For example, I’ve been looking at land in the Hudson Valley and Catskills regions of New York State and have seen land that cost $2,000/acre and others that have been over $100,000/acre. The main factors were views, if the property was on a river or lake, and the location - closer to New York City or the trendy towns in the Hudson Valley drove up the cost significantly. I am hoping to narrow in on some properties in the range of $10,000 per acre and want a minimum of 10 acres of land. So my land budget is about $100,000 to $150,000.

On the other hand, I have also been helping a client search for land in the High Desert of Oregon (a couple hours drive from Portland) and we are eyeing a property that is 60 acres for $199,000, or around $3,300/acre.

Soft Costs

When just throwing around rough numbers as you start thinking through the project budget, we recommend you allocate 20% of the project budget to soft costs with the remaining 80% going to the hard costs. This is a general rule of thumb and a good guideline to use before you start getting actual numbers to plug into your calculations. This 20% would cover design fees, engineering costs, permitting fees, insurance, financing costs, site survey, and other required expenses before ground is broken to start construction. Let’s break this down a bit further.

Design Fees
You can budget about 10-15% of the project budget for design fees. Some designers might be a bit cheaper but also may not offer the same level of service. Designing a custom home is a significant investment and you want a design team that is going to give it the time and dedication it needs to do it right and create a high-quality result. Compared to the cost of construction, design fees are still a small percentage of the overall project and not somewhere you want to cut costs. Design fees vary depending on the firm, their reputation, the budget of the project, what scope of work is included in the fee, and the local market, among other factors. In NYC we have seen 12% as a very common design fee percentage, where famous starchitect firms may be 15% or some could even be as high as 20-25%. I offer a few different tiers of design fees depending on the scope of work, 10%, 12%, or 15%.

For argument’s sake, let’s say you are looking to spend $1,000,000 on the construction of your home. You can thus budget between $100,000 to $150,000 for design fees.

Engineering/Consultant Fees
A few different engineers are needed for most residential projects: civil engineering, geotechnical (soils) engineering, and structural engineering. Occasionally we may also engage a Mechanical, Electrical, Plumbing engineer if it is a complex project, although typically we approach these systems as a design-build where the contractor who installs the system also does the design and permitting work. You can budget about 1% of the construction cost for each engineer as a placeholder before we get actual bids from companies. Fees could vary if it is a complicated site; steep topography for instance. A site survey is also required and could add another $5,000 or so in fees depending on the site. Other consultants may also be necessary like arborists, landscape designers, energy consultants, and others depending on the specifics of your project and your property.

For that same theoretical $1,000,000 project you are looking at around $35,000 to $50,000 in consultant fees.

Permitting Fees
Each jurisdiction has their own permitting process and associated fees. Typically there is a permit review fee for the actual time and effort for the building department to review the drawing set and issue an approved permit. On top of that, most cities and towns also asses system development charges for new construction. These are fees that cover town expenses for infrastructure and services like roads, schools, utilities (water and sewer systems), parks, and other amenities.

On a custom home we completed in Portland that was valued at $750,000 in new construction, the total city fees came in around $47,000.00. That includes about $16,500 in permit fees and $30,500 in System Development Charges (SDCs). That is a lot of money! Not every jurisdiction will be this expensive to get a permit. Call the town where you are planning to build and talk to someone in their building department. Alternatively, many places have permit fee calculators on their building department websites.

Let’s use $50,000 to be conservative.

Insurance
It is recommended that you carry insurance during the construction process. This would cover things like unexpected events: think fire, weather, vandalism, or theft. The goal is to have security that if there is an issue during construction your insurance would cover losses or increased expenses to prevent the bank from foreclosing on the project. Policies vary depending on deductible and coverage amount. Annual premiums can range between 1% and 4% of the project cost but call an insurance company to get specific quotes.

Say 1% for now, for $10,000.

Financing Costs
This would be the cost of securing a construction loan, plus the interest you will pay throughout the project’s construction. Most construction loans work like a line of credit, so you make monthly draws to pay for the General Contractor’s labor and materials. You then start accruing interest on that balance until the project is complete and you then refinance into a more traditional mortgage (at a lower interest rate and a longer loan term). Closing costs on the loan could be around 1% of the loan amount, and interest can add up quickly - probably around 5% of the loan amount over the course of year, although the actual amount will depend on the interest rate and length of construction.

Say $50,000 for the loan fees and 12 months of interest accrual.

Altogether we are right around $260,000 in expenses (using 10% for design fees) on top of the estimated construction cost of $1,000,000. That is almost exactly 20% of the project cost ($260,000/$1,260,000).

Hard Cost

Before construction has even begun you have already spent about 20% of your project budget, more if you include the cost of land. We understand it is stressful being this far into the project without even seeing progress on the site. This is why everyone is so excited when that permit approval arrives and construction can begin.

At this point the cost of your project shifts from the design team to the General Contractor. The GC will take over leading the project and will typically invoice monthly based on the construction progress and the month’s labor and material costs accrued. This monthly invoice will be approved and then sent to the bank to issue payment from your construction loan.

Let’s discuss how we can estimate the cost of construction. First, I’d like to state for the record that I dislike cost per square foot calculations. All square footage isn’t considered equal, so we shouldn’t assign the same cost evenly across the project. Kitchens and bathrooms are expensive with all of the electrical work, plumbing work, casework, cabinets, counters, tile, etc. On the other hand, bedrooms, typically just empty rooms, are cheap square footage. So adding a second kitchen is much more expensive on a cost per square foot basis than adding an extra bedroom. This all being said, sometimes cost per square foot is the easiest way to make quick calculations. Let’s walk through some calcs.

Typical construction costs for a nice custom home start at around $350 per square foot and go up from there. For example, a new construction 2,500 square foot home would have a rough construction budget of $875,000 (2500 x $350). However, if you are looking for something more towards the luxury side, you could start seeing cost per square foot approach $500/sf or even higher. There are hundreds of decisions we will make together throughout the design phase that will affect this cost. In our $1 million dollar house example mentioned in the soft costs section, we would be looking at about $400/sf.

Why do I hate cost per square foot so much? Let’s say you want a smaller house - more of a weekend getaway in the mountains rather than a larger home for full-time living. In that case maybe you only need a nicely designed 1,200sf home. Using the cost per square foot calculation you will get a construction cost of $420,000. Sounds great. However, that is misleading. The expensive parts of the home (kitchens and bathrooms, excavation, and utilities, etc. ) aren’t being subsidized by as much cheap square footage (bedrooms, dining room, etc.). You should expect the cost per square foot for smaller projects to be higher than larger homes. For some of the Accessory Dwelling Units (ADUs) we have designed, cost per square foot often came in at around $500/sf or more, and we even saw a couple come in closer to $800/sf (one was on a steeply sloped site with complicated foundations and structural requirements).

For nice round numbers, from my experience I would say a high-quality ADU would start at $250,000 in construction cost or $300,000 in full project costs and up. A small vacation home would start at around $500,000 in construction cost or $600,000 in full project cost and up. Meanwhile, a full custom home would start at around $1,000,000 in construction cost and $1,200,000 in full project cost and go up from there.

Other considerations for Construction Cost:

Clients have immense control over the final cost of their projects. We guide you through the hundreds of decisions to be made but at the end of the day you are the one who has the final say on what you are willing to spend, and make the decisions that affect the cost. For example, you can get tile for the bathroom that cost $3/sf or tile that costs $30/sf. Kitchen appliances could be a few thousand or $30,000. Windows and doors can be cheap vinyl or luxury triple-pane, high-efficient, European tilt-turn windows for hundreds of thousands. Roofing, siding, flooring, structure, heating/cooling systems, hardware, lighting fixtures, and dozens of other decisions will have large impacts on the final cost.

Of course the property you pick at the beginning will also impact the construction cost. Steep slopes could necessitate more expensive structure, retaining walls, and other site expenses. Granite bedrock close to the surface can make excavation extremely expensive, especially if you are considering a basement. Having to clear trees, or level a flat part of the site can add costs. If the building site is far back from the street you could have to build a long driveway and pay to get utilities back to the house location. If the property is rural and necessitates a septic system or water well, rather than tying into the city utilities, that could add significant cost. These are all reasons it is important to do due diligence and maybe even hire the design team prior to putting in an offer on a piece of land.

Conclusion

There is a lot to think about. Budgeting needs to be well thought out and will be affected by lots of outside forces and personal decisions. These numbers are just rough guidelines to get you started as you consider your options. Most importantly, we are happy to talk with you about your goals and ideas and offer any advice or insight based on the specifics of your project. Don’t hesitate to reach out with any questions. We can also help you crunch some early numbers and even help you find land if you want some help looking for the right property for your dream home. Let us know how we can help.

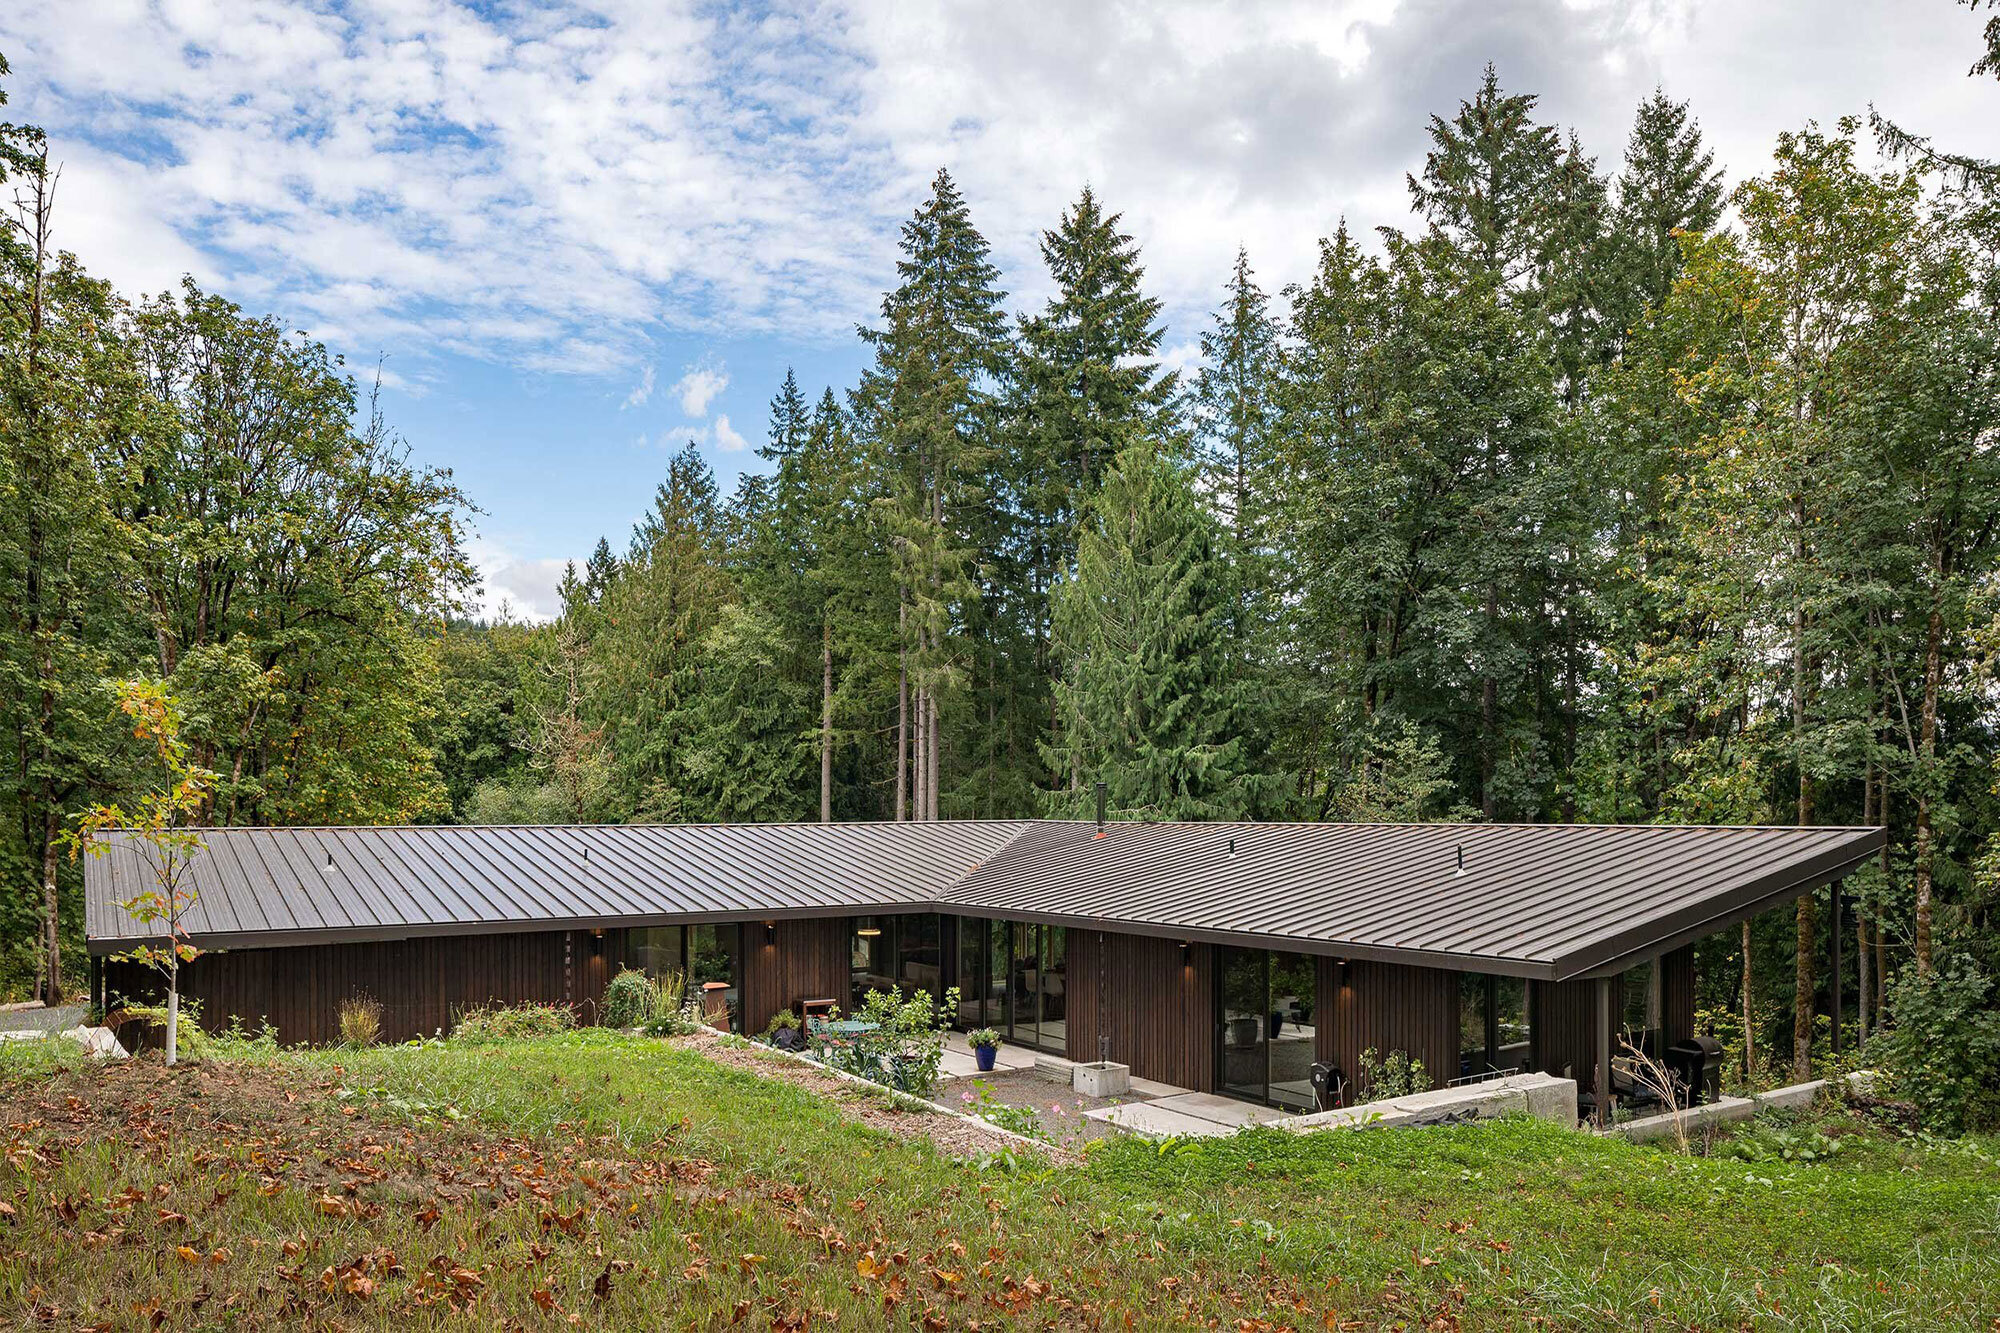
The Hill House is a schematic design we developed for a client in southern Washington State. The estimated construction cost was around $500/sf for a total cost of around $2,000,000. Excavating on a sloped site to get a basement garage, concrete and…

The Hill House is a schematic design we developed for a client in southern Washington State. The estimated construction cost was around $500/sf for a total cost of around $2,000,000. Excavating on a sloped site to get a basement garage, concrete and steel construction system, and the floor to ceiling window package were significant drivers of this cost.

 
The Sheltered Nook House was a very cost effective project coming in at around $350/sf for the house itself. At 2,200 sf the cost was around $780,000 for the house structure. On top of that was the cost of the land, cost of installing a well and sep…

The Sheltered Nook House was a very cost effective project coming in at around $350/sf for the house itself. At 2,200 sf the cost was around $780,000 for the house structure. On top of that was the cost of the land, cost of installing a well and septic system, some site grading, some excavation and retaining walls. The total project was closer to $1,000,000 when considering those other costs.

 
This Accessory Dwelling unit is just 700sf and ended up at around $400/sf. Smaller projects have a much higher cost per square foot since they have all the expensive parts of a full house but without the cheap space (extra bedrooms, living and dinin…

This Accessory Dwelling unit is just 700sf and ended up at around $400/sf. Smaller projects have a much higher cost per square foot since they have all the expensive parts of a full house but without the cheap space (extra bedrooms, living and dining rooms, etc.).

This project is around 1,200sf with a project cost of about $360,000 for a cost per square foot of around $300/sf. This is one of the more affordable projects we have done with the goal of balancing nicely designed spaces with affordable materials. …

This project is around 1,200sf with a project cost of about $360,000 for a cost per square foot of around $300/sf. This is one of the more affordable projects we have done with the goal of balancing nicely designed spaces with affordable materials. Fiberglass windows and doors, hardie-siding, asphalt shingle roof, Ikea kitchen, and affordable tiles and floor materials kept the cost down. Plus the 1,200sf includes the garage area which is a simple empty room with concrete floor and drywall walls.


How Much Does An ADU Cost?

More and more people are considering having an ADU designed and built for their property, and one of the primary questions they have is how much does an accessory dwelling unit cost to build? People like you want to know how to start budgeting for ADU projects whether they are living on Bainbridge Island outside of Seattle, in Portland, OR, or down in Los Angeles, California. ADU Cost is one of the most common questions we get and we will do our best to outline the areas that impact ADU budgets below.

The problem with googling “ADU Cost”

A quick search on google for cost of construction can lead to a wide range in estimates, and most of them are not realistic, especially for ADUs. Having worked on over 60 ADUs to date we have designed everything from simple 500sf projects on flat lots to larger 1000sf ADUs on tricky sloped sites. We have a good sense of the cost ranges for these projects and what factors impact the final price. We will do our best to outline how to set your budget and then will give a breakdown of ADU costs from a recent project that you can use as starting point to build your budget.

But first, let’s discuss cost per square foot numbers and why you shouldn’t use this is a way to develop a budget for ADU projects.

Many resources on the internet, some contractors, and many clients use cost per square foot as a basis to develop a budget for residential projects. I want to urge you not to use this as a metric to analyze your ADu budget. Although this can work if you have your numbers correct, we find that it can be very misleading for budgeting an accessory dwelling unit compared to a full custom home. The main problem has to do with scale.

Just like a large home, ADUs have all the expensive parts needed to live - a functional kitchen, bathrooms, plumbing and electrical systems, windows, doors, excavation and utility work, plus design costs and permitting fees. On a large home these costs get spread out over the larger square footage and cheaper space to build, like bedrooms and living rooms. A good way to think about it would be that the cheaper rooms like bedrooms and living rooms subsidize the more expensive rooms like kitchens and bathrooms plus utility connections, etc. ADU floor plans don’t have this advantage since they are limited in size.

Not all square footage is the same cost. A bedroom is just empty space with blank walls, a couple of windows perhaps, some flooring, and a couple of doors. This is relatively cheap to build. A kitchen on the other hand has all the walls and floor, but more lighting, appliances, counters, cabinets, plumbing work, more complicated electrical, etc. It is much more expensive to build. Where a bedroom may be $150/sf a Kitchen is more like $400 or $500/sf. This means that going from a 700sf to an 800sf project can actually bring your cost per square foot down considering both have a kitchen and a bathroom. The 800sf ADU spreads those costs out over an additional 100sf.

With ADUs being so small, they don’t have the extra square footage to spread the base costs out like a larger home does. A $200,000 five hundred square foot ADU would have a cost per square foot of $400. Where a $600,000 two thousand square foot home would only be $300/sf.

The point here is that we encourage people to develop a budget and then work to design something to hit that total project number. The size of the unit is less of an impact on final cost than the form, site conditions, materials, and systems selected. Start your project knowing that the base cost of building an ADU will be about $200,000 and then the decisions you make with your design team will impact what the final cost ends up being. Our advice is usually that ADUs come in between $200,000 on the low end and $500,000 on the upper end. We have seen some luxury ADUs in the Bay Area and Los Angeles even exceed $500,000.


How Much Should You Budget For Your ADU Project?

ADUs have three main costs to build into your budget: design fees, permitting fees, and construction costs.

ADU Design Cost

For a custom designed ADU you can expect that the design cost will be between 10-20% of your total project costs. These would include the cost of an architect or designer, structural engineer, surveyor, and other consultants that may be needed. Although most people decide they want a custom designed ADU that is specific to their needs, aesthetic taste, and responds to the unique character of their property, it is possible to save on the design cost by starting with a pre-designed ADU plan set. If you are trying to bootstrap a project and reduce costs as much as possible this could be a good way to go. We sell ADU floor plans of our past projects for those looking to save time and money. Shop for a floor plan design that works for you here: Modern ADU Floor Plans

ADU Permitting Cost

Permitting fees can vary greatly from city to city, but in Portland, Oregon you can expect that the permit fees for a detached ADU would be between $6,000 and $14,000, potentially more if you are going to use the ADU as a short term rental like Airbnb or VRBO. The big range here has to do with water service and whether you will have to upgrade the water meter for the property and/or add a new water meter for the accessory dwelling unit. If you are able to simply tie in to the existing water and sewer service of the main house you would fall on the lower end of the range. However, you may want to chose to install a new water meter if you will be using the ADU for rental income, so you can pass on the water utility bill to the tenants.

ADU Construction Cost

Construction cost is the big variable and depends on the site conditions, project size, design complexity, and the selection of materials and systems. We find that with today’s construction costs building an ADU, even smaller simpler projects on flat sites, will come in at $200,000 or more. That is sort of the baseline price, and the cost can go up from there depending on some of the variables mentioned above. Building an ADU can be complicated and we don’t advise taking shortcuts to save cost.

Although $200,000 is achievable for a nice but simple ADU, in our experience, most clients decide to add features that drives the cost up from that baseline. Whether it is nicer windows, higher performing systems, nicer interior finishes, high-end appliances, or premium materials, there is almost always a decision that is made where the clients balance the quality vs price and decide to upgrade the design. For this reason, we say that the average price of an ADU is about $250,000 in the Portland market. In places like the Bay Area or Seattle the average cost for an ADU is closer to $350,000 or more. On the higher end of the scale, if you are looking for a premium luxury ADU with the top of the line systems and appliances, high-end materials, and a premium design, you can look to spend $400,000 to $500,000 or even more.

Keep in mind that these construction cost estimates are for the construction only. On top of the construction costs needed to build the ADU, there would be the 10-15% in design fees and $6,000 to $14,000 in permitting fees. When you build your budget and talk to your design team about the project costs, make sure to be clear what the costs of construction are and what the total project costs are. $200,000 in construction costs probably means a total ADU project budget of closer to $240,000.

Interior view of a studio ADU on the second floor with a home office below.

Interior view of a studio ADU on the second floor with a home office below.

 
This project current being designed is on a sloped site which requires additional concrete foundation work.

This project current being designed is on a sloped site which requires additional concrete foundation work.


Accessory Dwelling Unit (ADU) Construction Cost Breakdown:

To give you a sense of how the construction budget gets to those ranges, below we have broken down a budget for a 790 square foot ADU we designed in the Cully Neighborhood in NE Portland. This ADU is being used to generate rental income and the couple who built it plan to move into the ADU when their kids leave the house. It was designed for aging-in-place with all necessary living functions on a single level.

Below is a rough construction cost breakdown for a 790 square foot sustainable ADU that was built in the summer of 2015 in Portland, OR (we’ve inflated pricing below to reflect an average 6% construction cost increase per year since that time). This design has a few unique elements that are reflected in the cost breakdown. The design includes a high performance envelope - typical wall construction with standard batt insulation walls & roof per code, plus an additional 2” of continuous exterior insulation on all the walls, and an additional 3” of continuous exterior insulation added to the roof, plus a fully insulated slab. We also designed it to have radiant floor heating with an on-demand hot water system. There was also a couple of unique custom windows that are significantly more than standard windows would be - however they were important to the design and function of the spaces.  

Finally, this breakdown is for the construction costs and doesn't include Architectural or Structural Design Fees. The design fees vary depending on the complexity and size of your project. We recommend budgeting about 10-15% on top of the construction cost for design fees, $6-14k for permitting, and we always recommend budgeting another 10% as a contingency fund to cover any unexpected costs that may come up.

Permits: $12,000
This includes the current Portland SDC Waiver. Typically permitting fees for an ADU fall around $6-$14k. This project came in at the higher end due to the fact we had to upgrade the water supply line & meter size due to the amount of plumbing fixtures in the main house and ADU combined.

Excavation: $15,000
Around a 650sf slab area including the exterior decks. Also included excavation for a couple landscaping retaining walls on the property.

Concrete Work: Footings & Retaining Walls: $28,000
This includes work needed for the ADU plus a couple of retaining walls that were designed as part of the surrounding landscaping.

Concrete Slab: $8,000
The interior exposed concrete slab and finishing for the floor of the main level. This was poured as a separate slab from the foundation footings.

Framing and Sheathing: $25,000
Typical 2x6 stud wall construction, 2x12 roof joists, supporting structural posts and beams. The large exposed glulam beam in the center of the project was around 30’ long to span the length of the living space.

Siding: $12,000
Horizontal fiber cement siding with vertical tongue & groove cedar siding at the front entry and back patio, as well as a cedar soffit under the eaves.

Roofing: $15,000
Standing seam metal roof

Windows and Doors: $15,000
2 custom windows (including a complex window that wraps the corner of the kitchen), 3 skylights, 8’ front door with sidelite, 8’ two panel sliding door, and three large vinyl sliding windows.

Plumbing: $25,000
Includes radiant floor heating installation and an on demand hot water system. Plumbing fixtures, sump pump, fire protection sprinklers & installation.

Electrical & Fixtures: $20,000
Electrical panel, electrical wiring, outlets and switches, lighting fixtures, and installation labor.

Insulation: $12,000
Roxul batt insulation in walls and ceiling stud cavities per code, plus an additional 2” of continuous exterior polyiso insulation on all walls, 3” of continuous exterior polyiso insulation added to the roof, and a fully insulated slab on grade. (This amount of insulation is well above code requirements and is close to passive house standards. With some solar panels this ADU could easily achieve net zero energy. )

Sheetrock (Drywall): $10,000
Drywall, mudding, taping, sanding

Interior Doors: $2,500
2 standard doors, 1 pocket door and 3 closet bi-folding doors

Paint - Exterior: $5,500
One color, no accent or trim color

Paint - Interior: $8,000
One color throughout the interior.

Trim Work: $5,500
1x4 painted MDF base trim, plus clear coated fir window sills

Cabinets: $6,500
IKEA kitchen cabinets and some custom casework in laundry and bathroom

Countertops: $1,500
Ikea wood countertops material and install labor

Tile: $7,000
Kitchen backsplash and shower - materials and labor

Staircase: $3,500
Off the shelf spiral staircase kit

Flooring in Loft: $3,500
Pre-finished solid White Oak, about $8/sf plus misc. materials and install labor

Cable Railing: $3,500
Off the shelf system

Appliances: $7,000
Stovetop, oven, vent hood, dishwasher, garbage disposal, refrigerator, washer, and dryer

TOTAL: $251,000
Includes all materials, labor and contractor fees.

The budget above is fairly typical for ADUs we have worked on over the years. And it is important to point out that this wasn’t a high-end or luxurious project. There were a few places where the clients made decisions to invest more to get the result they were looking for. For instance we had some custom windows, skylights, and radiant floor heating. The rigid insulation was also an upfront cost but will pay itself back through lower energy bills for the lifetime of the project. Meanwhile, the rest of the project was pretty standard materials and systems and in some places we used cheaper than normal elements, like the Ikea kitchen. Overall, we think this is a good starting point for most people who want a high-quality, nicely designed accessory dwelling unit in Portland, Oregon.

Important Note:
Every site is different and the conditions can greatly impact cost. Excavation and concrete work costs can vary greatly depending on the topography and of the site and other conditions (is it sloped? lots of trees? poor soil conditions? Does it need extra soil removal or backfill?). Ease of access to the location of the ADU can also add costs (are there fences that need to be removed and rebuilt? Can machinery get to the location to excavate or deliver materials? will a crane rental be required?). Material selections and other design decisions you and your designer will make throughout the process will also have a big impact on cost. The outline above is a good starting out point but I guarantee your project will end up being different.

If you have any questions don't hesitate to reach out. We are always happy to talk about the unique aspects of your project and talk through your goals and ideas for a sustainable Accessory Dwelling Unit.

This ADU in the Cully Neighborhood of Portland would cost about $250,000 to build.

This ADU in the Cully Neighborhood of Portland would cost about $250,000 to build.

 
Interior view of the ADU’s main living space with an open loft above. A 30’ long glulam beam spans the length of the living room.

Interior view of the ADU’s main living space with an open loft above. A 30’ long glulam beam spans the length of the living room.

 
A large custom window wraps the corner kitchen, offering great views to the surrounding yard.

A large custom window wraps the corner kitchen, offering great views to the surrounding yard.